

On the coldest evenings, a furnace that technically “works” can still leave bedrooms chilly, the family room stuffy, and the blower louder than you remember. Those symptoms rarely come from the brand name on the cabinet. They usually trace to airflow, duct sizing, and how well the system matches the home’s actual heat loss. Before replacing equipment purely for a higher-efficiency label, it pays to understand what to measure, which upgrades improve comfort most, and where common mistakes rob a system of performance. This guide outlines practical checks, choices, and simple preparations that help a heating upgrade deliver steady warmth instead of the same problems.
1.Early Signs Pointing to Airflow or Sizing Problems
If some rooms swelter while others never catch up, your system may be oversized, under-ducted, or both. Rapid starts and stops, called short cycling, point to a furnace that dumps heat too quickly for the ductwork to distribute it. A howling return grille or whistling supply register often signals high static pressure from an undersized return, a clogged or overly restrictive filter, or too many closed registers. If you plan an upgrade, work with a licensed HVAC contractor in Sandy.Homeowners can ask to test static pressure, verify temperature rise across the heat exchanger, and check duct sizing before recommending equipment.
Consider a split-level home where the upstairs bedroom doors stay closed at night. With only one central return in the hallway, the system pulls air mainly from the common area. The bedrooms develop pressure imbalances, starving those rooms of return airflow. The furnace cycles quickly, the hallway overheats, and the basement family room never warms. A simple return path fix, such as transfer grilles, jumper ducts, or dedicated returns, often stabilizes room-to-room temperatures more than turning the thermostat up another degree.
2.Measure Before You Replace: Load, Ducts, and Static Pressure
Right-sizing begins with a Manual J load calculation that considers window area and orientation, insulation levels, air leakage, and foundation type. The result isn’t a rule of thumb based on square footage; it is a room-by-room heat-loss profile that guides equipment size and airflow targets. A proper evaluation also includes a duct review using Manual D principles. Your contractor should measure total external static pressure with a manometer, compare it with the furnace or air handler’s rated limit, and estimate delivered airflow in cubic feet per minute. Paired with a temperature-rise reading across the heat exchanger, these numbers show whether the blower, filter rack, coil, and duct layout can move the air the equipment needs.
Imagine a townhome with a long trunk line feeding a back bedroom and a section of crushed flex duct in the attic. The return grille sits behind a couch, half blocked. Every call for heat sounds like a jet taking off, yet the back room still lags. Measurements show static pressure above the blower’s rating and low airflow to the far register. The practical fix is not a bigger furnace. It is restoring the crushed flex, adding or enlarging a return, and possibly installing a deeper media filter cabinet so filtration does not choke the blower.
3.Choosing Equipment: Staging, Blowers, and Dual Fuel Trade-offs
Single-stage furnaces run at full output every time, which can accentuate temperature swings and short cycling in tighter homes. Two-stage models start on a lower fire rate and step up only when needed, lengthening run times for more even temperatures and quieter operation. Modulating furnaces fine-tune output in small increments and, when paired with an ECM (electronically commutated) blower, can keep rooms steady with lower noise and better mixing. The trade-off is a higher upfront cost and more complex controls. In homes with zoning or long duct runs, those longer, lower output cycles often translate into noticeably better comfort.
In moderate cold climates, a heat pump paired with a gas furnace (dual fuel) can trim fuel use while keeping strong heat on the coldest nights. The system uses the heat pump above a set “balance point” temperature and switches to gas heat when demand rises. Key checks include electrical panel capacity for the outdoor unit, thermostat compatibility with staging and dual-fuel control, and defrost behavior during freezing fog or snow. Energy rates and your home’s heat loss shape where dual fuel makes financial sense; comfort-wise, properly set changeover temperatures prevent the chilly, breezy feel some people associate with older heat pumps.
4.Duct and Control Fixes That Often Deliver the Biggest Gains
Many homes need more return air as much as they need new equipment. Adding or upsizing return grilles, especially for closed-door bedrooms, reduces pressure imbalances and lowers noise. Sealing leaky joints with mastic or UL 181 tape (not cloth duct tape) keeps heated air in the ducts instead of the attic or crawlspace. Insulating supply runs in unconditioned spaces protects delivered temperature. Manual balancing with volume dampers at branch takeoffs can nudge more airflow to colder rooms, but it helps only when the trunk and returns are sized to move the needed CFM without exceeding the blower’s pressure limit.
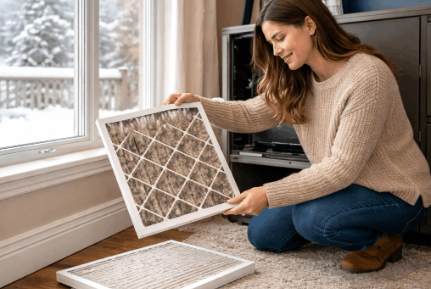
Controls matter too. Place the thermostat away from supply registers, direct sunlight, and heat-generating appliances to avoid false readings. If you adopt a smart thermostat, configure staging and fan profiles to match your equipment. For filtration, the highest MERV number isn’t always best. Filters with high pressure drop can starve airflow and trip the furnace’s limit switch. A deeper media cabinet with a high-surface-area filter often captures fine particles while keeping resistance low, protecting both indoor air quality and system performance.
Prepare for a Professional Visit and Keep It Working
Before your appointment, list rooms that run hot or cold, note whether doors are typically closed, and take photos of accessible ductwork, the return plenum, and any volume dampers. Jot down equipment model numbers, filter size, and where the flue, refrigerant lines (if you have a heat pump or AC), and condensate drain run. Clear a few feet of space around the furnace and return grilles. Ask the technician to provide static pressure readings, temperature rise, and, for gas furnaces, a combustion analysis and gas valve pressure. Request that any replacement sizing be based on a Manual J and that duct recommendations follow Manual D, with written commissioning data when the job is complete.
After the work, keep the system healthy with simple habits. Replace filters on schedule, and keep furniture and drapes off return grilles so the blower can breathe. If you have a condensing furnace, inspect the condensate drain line for kinks or algae and keep the trap filled. Test carbon monoxide detectors according to the manufacturer’s instructions, and schedule a heating check before winter to verify temperature rise, blower speeds, and safety controls. If a room drifts out of range again, revisit damper positions and confirm that thick replacement filters are not pushing static pressure past the blower’s comfort zone. Small, measured adjustments preserve the gains your upgrade delivered.
