

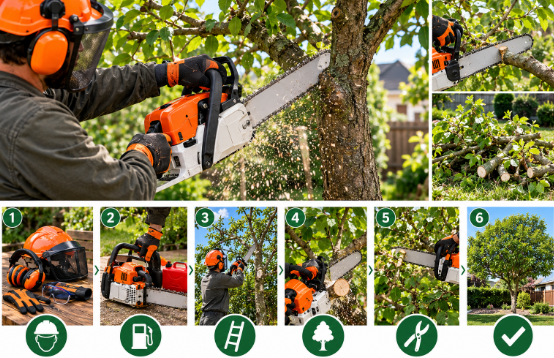
Trees are often the backbone of a garden. They provide shade, privacy, fruit, shelter for birds and a sense of structure that no flower bed can match. But left to their own devices, they quickly become overgrown. Branches crowd each other, dead wood accumulates, limbs start rubbing against the roof, and the lawn underneath slowly disappears into shade.
Regular trimming keeps trees healthy and attractive, and for anything thicker than a couple of inches, a gas chainsaw makes the work much faster. But trimming is different from cutting firewood. Every cut affects how the tree grows and heals, and a careless approach can leave wounds that invite disease or ruin the tree’s shape for years. Here’s how to do it properly and safely.
Why Trim Your Trees?
Before starting, it helps to be clear about what you’re trying to achieve. The main goals of trimming are usually:
- Health: removing dead, diseased or damaged branches before they spread problems or fall.
- Safety: clearing limbs that overhang the house, paths, driveways or power lines.
- Structure: correcting weak branch angles, crossing limbs and competing leaders.
- Light and air: thinning dense crowns so sunlight reaches the lawn and plants below, and air circulates freely.
- Appearance: shaping the tree so it fits the space and looks balanced.
Knowing your goal helps you decide which branches to remove and which to leave.
Choose the Right Time
Timing matters. For most deciduous trees, late winter or early spring, while the tree is dormant, is the best time for structural pruning. Without leaves, you can see the branch structure clearly, and the tree heals quickly once growth resumes.
There are exceptions. Some trees, like maples and birches, “bleed” sap heavily when pruned in late winter, so they’re often trimmed in summer instead. Stone fruit trees such as cherries and plums are usually pruned in summer to reduce the risk of fungal infections. Dead or dangerous branches, on the other hand, can be removed at any time of year.
Avoid heavy pruning during spring nesting season, when birds may be using your trees, and check local regulations, as some areas protect certain trees.
Prepare Yourself and the Saw
Wear full protective gear: chainsaw chaps, a helmet with face shield and ear protection, cut-resistant gloves and boots with good grip. Falling branches, flying wood chips and noise are all part of trimming work.
Check the saw before starting. Make sure the chain is sharp and properly tensioned, the chain brake works, and the bar oil and fuel are topped up. A sharp chain is especially important for trimming, because it produces clean cuts that heal better.
For trimming, a lighter saw with a 12 to 16-inch bar is ideal. It’s easier to control at different angles and reduces fatigue.
Plan Your Cuts
Walk around the tree and look at it from several angles before you cut anything. Start by identifying branches that clearly need to go:
- Dead branches, which are often brittle, lack buds and have flaking bark.
- Diseased or damaged branches, cracked, split or showing signs of decay.
- Crossing or rubbing branches, which damage each other’s bark.
- Water sprouts, the vigorous vertical shoots that grow from branches.
- Suckers, shoots growing from the base of the trunk or the roots.
- Branches growing inward toward the center of the crown.
Then step back and consider the overall shape. Remove only what’s necessary. A good rule is to avoid taking off more than about a quarter of the living canopy in a single season. Over-pruning stresses the tree and often triggers a flush of weak, fast-growing shoots.
Mastering Garden Tree Trimming Technique
Good garden tree trimming is all about where and how you cut. The goal is to remove the branch cleanly without damaging the trunk or leaving stubs that rot.
Find the branch collar
At the base of every branch, where it joins the trunk or a larger limb, there’s a slightly swollen ring of bark called the branch collar. This area contains the tissue that helps the tree seal the wound. Always cut just outside the collar, never flush with the trunk, and never leave a long stub.
Use the three-cut method for larger limbs
For any branch heavy enough to tear as it falls, the three-cut method prevents the bark from ripping down the trunk:
- Undercut: about 12 to 18 inches from the trunk, cut upward from the underside of the branch, about a third of the way through.
- Top cut: a few inches farther out than the undercut, cut down from the top until the branch breaks off. The undercut stops the bark from tearing.
- Final cut: remove the remaining stub with a clean cut just outside the branch collar.
This technique takes a few extra seconds but makes a huge difference to the tree’s health.
Smaller branches
Branches under about two inches in diameter are often better handled with loppers or a pruning saw, which give more precise control. A chainsaw shines on thicker limbs.
Avoid topping
Cutting the top off a tree or shortening main branches to stubs, known as topping, is one of the most damaging things you can do. It weakens the tree, encourages unstable regrowth and often leads to decay. If a tree is too tall for its space, thinning cuts or professional advice are better options.
Stay Safe While Trimming
Trimming involves more awkward positions than most chainsaw jobs, which raises the risk.
- Keep your feet on the ground. Never use a chainsaw on a ladder or while climbing a tree. For higher branches, use a pole saw or call a certified arborist.
- Keep the saw below shoulder height. Cutting above your shoulders makes the saw harder to control and brings the bar close to your face.
- Watch for kickback. Avoid contact with the tip of the bar, especially when reaching into dense branches where it’s easy to touch another limb.
- Know where branches will fall. Clear the drop zone and stand to the side, never directly under the branch you’re cutting.
- Look up. Check for loose or hanging branches above you before you start.
- Keep others away. Children, pets and helpers should stay well clear.
Handling Diseased Trees
If you’re cutting out diseased wood, clean your tools between cuts or between trees to avoid spreading the infection. Wipe the chain and bar with a disinfectant solution, and dispose of diseased branches rather than composting or chipping them for mulch.
Cleaning Up
Once the trimming is done, deal with the debris. Thicker branches can be cut into firewood, smaller ones chipped into mulch, and twiggy material composted or taken to a green waste center. A small log pile in a quiet corner can also become a valuable habitat for insects and small wildlife.
Aftercare
Most healthy trees don’t need wound paint or sealants after pruning. Research has shown that trees seal wounds better on their own, provided the cut is clean and made at the right spot.
Water the tree during dry spells, especially after significant trimming, and keep an eye on how it responds over the following season. Regular, light trimming every year or two is far better for the tree than an occasional heavy cut.
When to Call a Professional
Some jobs are beyond the scope of home trimming. Large trees, branches above head height, limbs near power lines or buildings, and trees showing signs of serious decay or instability should be handled by a certified arborist. They have the training, equipment and insurance to do the job safely.
Final Thoughts
Trimming garden trees is one of those tasks that, done well, pays off for years. The tree grows stronger, healthier and better shaped, the garden gets more light, and you reduce the risk of falling branches.
Used with care, a gas chainsaw for tree trimming turns heavy pruning work into a manageable afternoon. Plan each cut, respect the branch collar, use the three-cut method for larger limbs, keep both feet on the ground and know when to call in the experts. Your trees, and your garden, will thank you for it.
